
nginx,unit都是nginx公司的产品,主要是web server的后台搭建,其介绍可以参看官网:https://www.nginx.com/
wordpress, mysql,django这里就不介绍了,可以到网上查看。
网上的搭建介绍有很多,不过坑也很多(可参见https://www.nginx.com/blog/configuring-nginx-unit-for-production-applications-serving-django-project/)。
本文主要是关于应用上述软件在Linux上实现web server的应用:wordpress和django的实例。
- 环境:
系统:Ubuntu 16.04 LTS
nginx 软件包
unit软件包
MySQL数据库
word press软件包
django软件包
- 安装:
-
安装MySQL 命令:
wget http://repo.mysql.com/mysql-apt-config_0.8.9-1_all.deb sudo dpkg -i mysql-apt-config_0.8.9-1_all.deb sudo apt-get update sudo apt-get install mysql-server- 键入新的MySQL root口令:
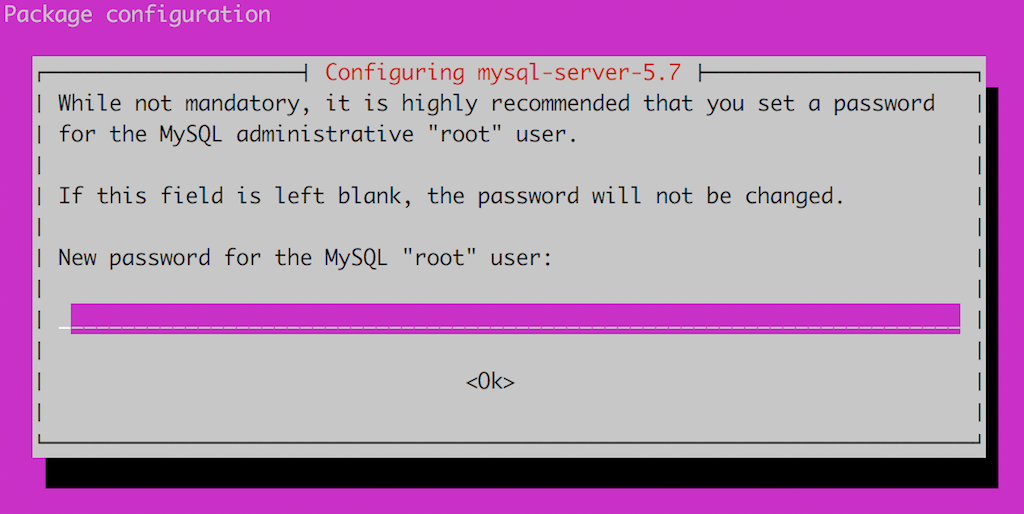
- 运行MySQL配置工具并响应提示:
$ sudo mysql_secure_installation
VALIDATE PASSWORD PLUGIN can be used to test passwords and improve security. It
checks the strength of password and allows the users to set only those passwords
which are secure enough. Would you like to setup VALIDATE PASSWORD plugin?
Press y|Y for Yes, any other key for No:
Using existing password for root.
Change the password for root ? ((Press y|Y for Yes, any other key for No) :
By default, a MySQL installation has an anonymous user, allowing anyone to log
into MySQL without having to have a user account created for them. This is
intended only for testing, and to make the installation go a bit smoother.
You should remove them before moving into a production environment.
Remove anonymous users? (Press y|Y for Yes, any other key for No) :
Normally, root should only be allowed to connect from 'localhost'. This ensures
that someone cannot guess at the root password from the network.
Disallow root login remotely? (Press y|Y for Yes, any other key for No) :
By default, MySQL comes with a database named 'test' that anyone can access. This
is also intended only for testing, and should be removed before moving into a
production environment.
Remove test database and access to it? (Press y|Y for Yes, any other key for No) :
Reloading the privilege tables will ensure that all changes made so far will take
effect immediately.
Reload privilege tables now? (Press y|Y for Yes, any other key for No) :
All done!
创建wordpress数据库:
- 登录MySQL root帐户:
$ sudo mysql -u root -p - 为WordPress创建一个数据库:
(mysql创建数据库默认的字符为latin1,因此如果要用到中文等就要加上字符选项:uft8)mysql> CREATE DATABASE wordpress CHARACTER SET utf8 COLLATE utf8_general_ci; - 创建一个WordPress用户和密码:
mysql> CREATE USER wp_user@localhost IDENTIFIED BY 'wp_password'; (这里用"wp_user"用户名:Linux下存在的用户,密码用"wp_password") - 为新创建的用户授予权限:
mysql> GRANT ALL PRIVILEGES ON wordpress.* TO wp_user@localhost; - 让MySQL识别更改:
mysql> FLUSH PRIVILEGES; - 退出MySQL:
mysql> Exit
Bye
- 键入新的MySQL root口令:
-
安装WordPress
- 创建示例配置文件的副本,将其命名为wp-config.php:
$ cd /var/www/ $ curl -O https://wordpress.org/latest.tar.gz $ tar xzvf latest.tar.gz $ cd wordpress $ sudo cp wp-config-sample.php wp-config.php - 要加强安全性,请使用WordPress salt功能随机生成新的密钥。更改密钥允许管理员强制所有用户再次登录。输出类似于以下内容; 将值从输出复制到wp-config.php。
$ curl -s https://api.wordpress.org/secret-key/1.1/salt/ define('AUTH_KEY', '3LJ|w/!Fit|/mo]>XLxWU+dG+7N+)64Y.KVVNoQ#X}1.s[os'); define('SECURE_AUTH_KEY', ')%C_q0{RNEe1+A{>C=#|y3c2} e J)AsxXq}z0H;x#$0J{o{'); define('LOGGED_IN_KEY', '@hD(g;-os^||uVI%6&`U1WI3YIz)F:7&Y%[jW]@DawoP{]A['); define('NONCE_KEY', 'fVv:A3(XNG`fXNi6Pmg#4,UnX)K|t8+jO{iv7g2Fay&kDJzV'); define('AUTH_SALT', ']s2/a`+2z~5+c6g)f-^h~D,@7C(eNr63x}Zz[)H]:!>=Q5(f'); define('SECURE_AUTH_SALT', 'Xw8x`IO.,@Y6l5)NK9)#!8V?s=&nzwXLRIwiBc,k];k3_%Fo'); define('LOGGED_IN_SALT', '3<.D-+I#Lr6+~We@1+~%LO=s9FHkgxV+w-l-S8g%BVC:dMD<'); define('NONCE_SALT', 'UVc/gj1Mjh*Tcl|9aq)YR|1!045=-2VpxNXrDNl>})9-Q>[x'); - 使用熟悉的文本编辑器,打开wp-config.php。我们在这里使用nano:
$ sudo nano wp-config.php - 在wp-config.php中找到以下行,并将文本替换为创建MySQL数据库和WordPress用户的的数据库名称和密码。对于该部分中使用的用户名,替换wp_user或类似的值:
// ** MySQL settings - You can get this info from your web host ** // /** The name of the database for WordPress */ define('DB_NAME', 'wordpress'); /** MySQL database username */ define('DB_USER', 'wp_user'); /** MySQL database password */ define('DB_PASSWORD', 'wp_password'); - 在wp-config.php中找到以下行,并用在salt步骤中生成的值替换掉到以下行中的值:
define('AUTH_KEY', 'value generated by salt'); define('SECURE_AUTH_KEY', 'value generated by salt'); define('LOGGED_IN_KEY', 'value generated by salt'); define('NONCE_KEY', 'value generated by salt'); define('AUTH_SALT', 'value generated by salt'); define('SECURE_AUTH_SALT', 'value generated by salt'); define('LOGGED_IN_SALT', 'value generated by salt'); define('NONCE_SALT', 'value generated by salt'); - 保存并退出该文件。
- 为你的用户设置以下读写权限(替换相应的名称wp_user):
$ sudo chown -R wp_user:www-data /var/www/wordpress $ sudo find /var/www/wordpress -type d -exec chmod g+s {} \; $ sudo chmod g+w /var/www/wordpress/wp-content $ sudo chmod -R g+w /var/www/wordpress/wp-content/themes $ sudo chmod -R g+w /var/www/wordpress/wp-content/plugins - 安装最常用于WordPress的PHP 7.0扩展:
$ sudo apt-get install -y php7.0 php7.0-common php7.0-mbstring\
php7.0-gd php7.0-intl php7.0-xml php7.0-mysql php7.0-mcrypt
- 创建示例配置文件的副本,将其命名为wp-config.php:
-
安装NGINX UNIT
- 按照NGINX UNIT文档中的说明,为操作系统安装预编译的NGINX Unit软件包:
- 安装key:
$ wget https://nginx.org/keys/nginx_signing.key?_ga=2.126232975.340043302.1547638338-1360543718.1546416274 $ sudo apt-key add nginx_signing.key\?_ga\=2.126232975.340043302.1547638338-1360543718.1546416274 - 安装源:
将下列源地址加入的source.list,用nano编译器:deb https://packages.nginx.org/unit/ubuntu/ xenial unit deb-src https://packages.nginx.org/unit/ubuntu/ xenial unit $ sudo nano /etc/apt/sources.list - 然后更新系统,进行unit的安装:
$sudo apt-get update $ sudo apt-get install unit - 为PHP安装额外的NGINX Unit模块(以及python3等的模块):
$ sudo apt-get install unit-php unit-python2.7 unit-python3.5 unit-go unit-perl unit-ruby unit-dev - 安装key:
- 运行这些命令以验证NGINX Unit和PHP是否按预期运行:
$ sudo service unit restart $ sudo curl -X PUT --data-binary @/usr/share/doc/unit-php/examples/unit.config --unix-socket /run/control.unit.sock http://localhost/config $ curl http://localhost:8300/如果出现phpinfo页面,则表明Unit已正确安装。如果没有,请参阅组故障排除指南。
- 配置NGINX UNIT
以下说明为WordPress创建一个JSON格式配置文件,并使用NGINX Unit API将其加载到NGINX Unit中。这会立即更新我们在上一步骤加载的初始NGINX unit测试配置。- 将目录更改为要存储WordPress配置文件的位置(我们正在使用/var/www/wordpress):
$ cd /var/www/wordpress - 使用熟悉的文本编辑器,创建一个名为wordpress.config的新文件。和以前一样,我们使用nano:
$ sudo nano wordpress.config - 复制以下内容并保存文件:
{
    "listeners": {
        "127.0.0.1:8090": {
            "application": "script_index_php"
        },
        "127.0.0.1:8091": {
            "application": "direct_php"
        }
    },

    "applications": {
        "script_index_php": {
            "type": "php",
            "processes": {
                "max": 20,
                "spare": 5
            },
            "user": "www-data",
            "group": "www-data",
            "root": "/var/www/wordpress",
            "script": "index.php"
        },
        "direct_php": {
            "type": "php",
            "processes": {
                "max": 5,
                "spare": 0
            },
            "user": "www-data",
            "group": "www-data",
            "root": "/var/www/wordpress",
            "index": "index.php"
        }
    }
}
此配置创建两个NGINX Unit应用程序,每个URL方案 – Web应用程序和管理面板。
使用NGINX Unit script参数而不是index参数意味着对未找到的页面的请求使用WordPress中的主index.php脚本。有关更多信息,请参阅PHP应用程序对象的NGINX UNIT文档。
要扩展应用程序,请相应地更改IP地址和端口。
- 运行此curl命令以加载配置:
$ curl -X PUT --data-binary @/var/www/wordpress/wordpress.config --unix-socket /run/control.unit.sock http://localhost/config
- 将目录更改为要存储WordPress配置文件的位置(我们正在使用/var/www/wordpress):
- 按照NGINX UNIT文档中的说明,为操作系统安装预编译的NGINX Unit软件包:
-
-
-
安装NGINX
-
-
更新Ubuntu存储库信息:
$ sudo apt-get update
-
安装包:
$ sudo apt-get install nginx
-
验证安装:
$ sudo nginx -v
nginx version: nginx/1.10.3 (Ubuntu)
- 启动NGINX:
$ sudo service nginx start - 在浏览器中,导航到NGINX主机的IP地址或主机名。此页面的外观确认NGINX正在运行。
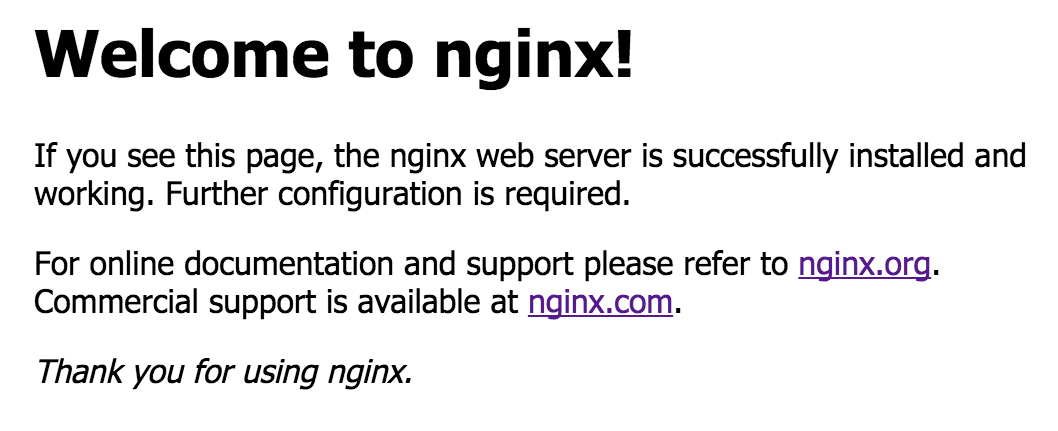 您还可以在NGINX主机上运行以下命令,并确认该页面的原始HTML代码显示在终端中。
$ curl localhost如果该
curl命令有效,如浏览器访问没有看到所需的界面,请检查路由配置,防火墙以及影响NGINX主机和客户端计算机之间流量的任何网络设置。
-
-
- 配置NGINX
- 创建NGINX默认配置文件的备份:
$ cd /etc/nginx/sites-available/ $ sudo mv default default.bak - 使用熟悉的文本编辑器,创建一个新的默认配置文件(我们再次使用nano):
$ sudo nano default - 将以下内容复制到文件中并保存:
upstream index_php_upstream {
    server 127.0.0.1:8090; # NGINX Unit backend address for index.php with
                           # 'script' parameter
}

upstream direct_php_upstream {
    server 127.0.0.1:8091; # NGINX Unit backend address for generic PHP file handling
}

server {
    listen      80;
    server_name localhost;
    root        /var/www/wordpress/;

    location / {
        try_files $uri @index_php;
    }

    location @index_php {
        proxy_pass       http://index_php_upstream;
        proxy_set_header Host $host;
    }

    location /wp-admin {
        index index.php;
    }

    location ~* .php$ {
        try_files        $uri =404;
        proxy_pass       http://direct_php_upstream;
        proxy_set_header Host $host;
    }
}
第一个
location块处理对根URL(/)的请求。该try_files指令搜索确切的URI。如果它不存在,则将请求发送到第二个命名位置@index_php,该位置将其代理到index_php_upstream上游组。第三个
location块处理对/ wp-admin的请求,并直接提供index.php文件。此位置不需要处理未找到的URL。最后一个
location块处理与正则表达式匹配的.php扩展名的请求。它将请求代理到index_php_upstream上游组,其中通用NGINX Unit应用程序直接处理所有PHP请求。该try_files指令404通过显示由NGINX直接生成的页面来处理错误。另一种选择是让WordPress的处理404错误,通过更换=404用@index_php。 - 运行此命令以验证配置在语法上是否有效:
$ sudo nginx -t - 如果没有错误可以重新加载配置:
$ sudo nginx -s reload - 在Web浏览器中,导航到WordPress站点的IP地址或主机名并完成安装:
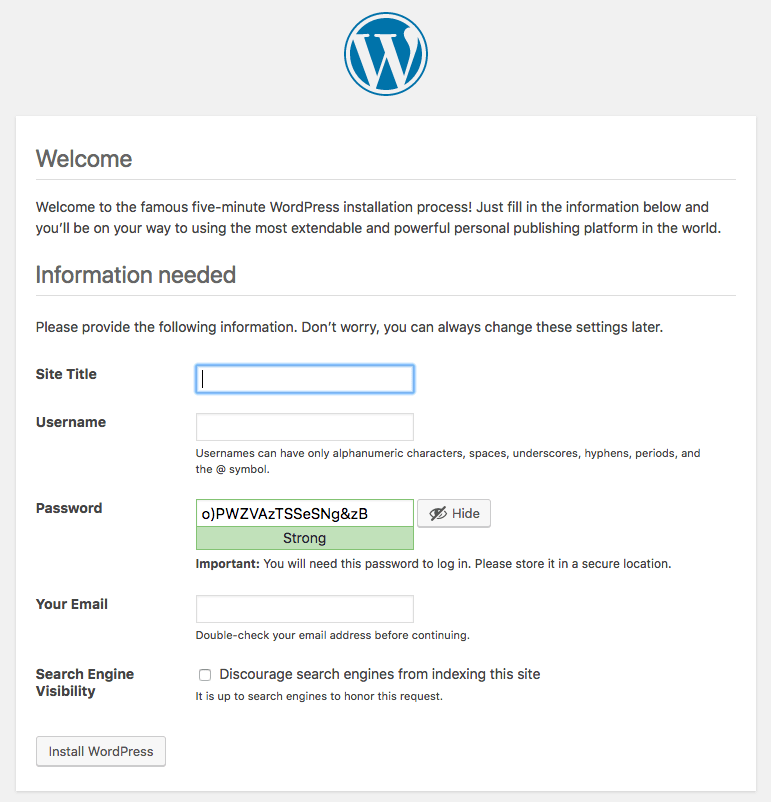 你们都准备好了!现在,您可以使用NGINX和NGINX Unit在“LEMU”堆栈中启动并运行WordPress。
- 创建NGINX默认配置文件的备份:
- Django 应用:
-
- Django的安装:(用pip3:对应的是python3):
$ sudo pip3 install Django - 创建Django项目的目录:
$ cd /var/www/ - 使用
django-admin startproject命令创建新项目。我们称之为djapp。$ sudo django-admin startproject djapp - 切换到项目目录:
$ cd djapp - 仍然用MySQL root来创建一个djapp使用的数据库如djapp,用户仍为wp_suer,方法同上。
- 使用首选的文本编辑器,打开settings.py。我们在这里使用nano:
$ sudo nano djapp/settings.py - 找到数据库的段落,如下所示。
DATABASES = { 'default': { 'ENGINE': 'django.db.backends.sqlite3', 'NAME': os.path.join(BASE_DIR, 'db.sqlite3'), },- 这是django默认使用sqlite数据库名为:db.sqlite3(你可以在当前目录中看到该文件)
为使用MySQL数据库要将上面的内容改为:
DATABASES = { 'default': { 'ENGINE': 'django.db.backends.mysql', 'NAME': 'djapp', 'USER': 'wp_user', 'PASSWORD': 'wp_password', 'HOST': 'localhost', },- 找到该
ALLOWED_HOSTS行并添加应用程序的域名,主机名或IP地址:ALLOWED_HOSTS = ['domain-name'] - 还要在文件末尾添加以下行,以命名存储应用程序所服务的所有静态内容的目录(请参阅上面步骤)。
STATIC_ROOT = '/var/www/djapp/djapp/static' - 运行
manage.py collectstatic命令以收集位于Django项目中的所有静态文件,并将它们放入STATIC_ROOT,上面步骤中定义的位置。$ sudo python3 manage.py collectstatic - 运行
manage.py createsuperuser命令创建管理者:$ sudo python3 manage.py createsuperuser
- Django的安装:(用pip3:对应的是python3):
-
-
配置NGINX
- 将目录更改为/etc/nginx/conf.d,这是特定的(或在我们的示例中,特定于应用程序)HTTP配置文件的传统位置:
$ cd /etc/nginx/conf.d - 创建一个名为django.conf的文件(我们再次使用
nano):$ sudo nano django.conf - 插入以下配置。我们正在启用缓存和健康检查,仅适用于NGINX Plus。
health_check如果使用NGINX Open Source,请注释掉或删除该指令。需要注意的一点是,在演示中,我将本地计算机的IP地址指定为proxy_set_header指令的第二个参数。在运行环境中,使用$host变量更有意义,如下所示(不知为什么status_zone和proxy_cache这三行在测试时都不能通过,只好注释掉)。# Upstream group for the backend (NGINX Unit running the Python application) upstream django_unit { zone django_unit 64k; server 127.0.0.1:8000; } server { listen 8080; status_zone django; # enable caching proxy_cache django_cache; proxy_cache_valid 200 60m; # root directory for static files root /var/www/djapp/djapp; # proxy to the NGINX Unit backend location / { proxy_pass http://django_unit; # Second argument must match your production hostname and the value of # ALLOWED_HOSTS in settings.py proxy_set_header Host $host; # optional active health check (NGINX Plus only) health_check; } # Location for the static files collected from Django and served by # NGINX Plus; can be empty (as here), because it inherits the value of the # 'root' directive from its parent block location /static { } } - 检查配置的语法有效性:
$ sudo nginx –t - 修复任何错误后,重新加载配置:
$ sudo nginx -s reload
- 将目录更改为/etc/nginx/conf.d,这是特定的(或在我们的示例中,特定于应用程序)HTTP配置文件的传统位置:
-
配置NGINX UNIT
-
运行此curl命令以显示当前NGINX Unit配置,该配置适用于在PHP上运行的WordPress。我没有在这里显示输出,但是WordPress配置出现在下面的步骤中,以及我们即将添加的Python应用程序的配置。
请注意,
sudo用于curl命令,你可能不需要为大多数curl命令执行此操作。这是必要的,因为要访问UNIX socket,我们需要root具有读写权限。$ sudo curl --unix-socket /run/control.unit.sock http://localhost/config/ - 切换到NGINX Unit配置文件的目录。请记住,这些文件是可选的,只是一种加载配置集合的便捷方式,无需键入所有数据作为对NGINX Unit API调用的参数。由于文件的内容是通过API上传的(与所有配置数据一样),NGINX Unit不知道文件位置,并且在启动时无法自动读取文件(与NGINX Open Source和NGINX Plus不同)。相反,NGINX Unit将其运行时状态保存在单独的目录中。
$ cd /etc/unit - 创建一个名为django.config的文件(我们正在使用
nano):$ sudo nano django.config添加以下JSON语句,它代表我们的Python应用程序(注意这里的user的定义一定是我们为Django项目创建的数据库用户)。
{ "type": "python 3.5", "processes": 5, "user": "wp_user", "module": "djapp.wsgi", "path": "/var/www/djapp" } - 运行此curl命令以将django.config中包含的JSON文件加载为由NGINX Unit管理的新应用程序对象,称为djapp:
$ sudo curl -X PUT --data-binary @/etc/unit/django.config --unix-socket /run/control.unit.sock http://localhost/config/applications/djapp在此命令中:
- HTTP
PUT方法在最终参数(URL)命名的位置创建新的NGINX Unit配置对象。见下面的最后一个子单。 - 该
--data-binary参数告诉curl我们完全按照提供的方式加载django.config的内容,保留换行符和回车符,而不进行任何类型的处理。 - 该
--unix-socket参数定义了NGINX Unit API正在侦听的位置。(我们使用该sudo命令,因为我们使用socket的默认所有者,root。) - 最后一个参数定位并命名要在django.config中使用JSON格式的配置数据填充的新应用程序对象:
config是顶级NGINX Unit配置对象,applications应用程序对象的父对象以及djapp新应用程序对象的名称
- HTTP
- 定义应用程序的侦听器对象。我们不是像在步骤4中那样加载配置数据文件,而是直接在curl命令行上定义数据,指定djapp应用程序侦听端口8000。
$ sudo curl -X PUT --data-binary '{"application":"djapp"}' --unix-socket /run/control.unit.sock 'http://localhost/config/listeners/*:8000' - 重复curl步骤中的命令以显示NGINX Unit配置,该配置现在包括我们的Python应用程序djapp:
$ sudo curl --unix-socket /run/control.unit.sock http://localhost/config/ { "listeners": { "127.0.0.1:8090": { "application": "script_index_php" }, "127.0.0.1:8091": { "application": "direct_php" }, "*:8000": { "application": "djapp" } }, "applications": { "script_index_php": { "type": "php", "processes": { "max": 20, "spare": 5 }, "user": "www-data", "group": "www-data", "root": "/var/www/wordpress", "script": "index.php" }, "direct_php": { "type": "php", "processes": { "max": 5, "spare": 0 }, "user": "www-data", "group": "www-data", "root": "/var/www/wordpress", "index": "index.php" }, "djapp": { "type": "python 3.5", "processes": 5, "user": "wp_user", "module": "djapp.wsgi", "path": "/var/www/djapp" } } } - 在浏览器中输入
localhost:8000就可以看到djapp的运行情况了。输入localhost:8000/admin就可以进入到管理界面输入用manage.py createsuperuser创建的用户就可以登录进去进行管理了。
-
- 小结:至此完成了unit,nginx,mysql,wordpress,django的配置。做个记录以备不时之需。
-
No Comments